A student is sitting in a Creative Writing class. The instructor comes in and tells the class they are to write a story containing the following three element: religion; sex; and mystery. However, it had to be as short ass possible.
The next day this student came back and handed in the assignment. On the following day, the instructor returned and handed back all the papers. To the student's delight they found out their paper was the only one to receive an "A". The teachers note said "Very creative".
The short story was entitled "Our House Restoration". Here it is in it's entirety:
"Oh my lord, what have we done?! We're screwed." The End.
Anyway, here are some pics.
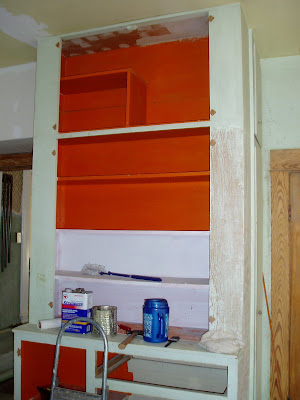
 We have started the restoring the built-in cabinet so that it will kind of 'look' like it belongs in the house.
It was built in a somewhat haphazard way with lots of imperfections. I'm hoping to use what you see here as the 'bones' of a nice cabinet.
Don't you just love that orange?!?! Come on admit it - you love it!!!
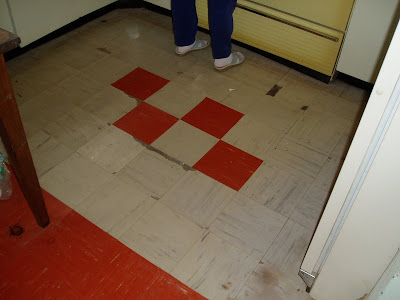
Matches the floor you know.
 Another fine view of the cabinet.
I really should have removed the cardboard box sitting on the floor (in the cabinet, behind the paint cans). The floor in this spot is completely untouched, original, and is nice looking.
 Sorry for the darkness of the pic. I was trying to get the whole thing in so you could see the stripped molding.
 Here are the vertical pieces of molding for the above window. Isn't the marbling nice.
We were told that the original builder brought in French Heart Pine to be used throughout the house. From what I've been able to find out, French heart Pine is created by the way the wood is cut in order to get this effect. When stained with the appropriate color it will mimic the more expensive woods like cherry and maple.
Try as I might, I can not find any of this wood anywhere. Every lumber dealer I've spoken to has said I will need to buy maple, oak or such just to match it. So, I opted to repair the termite damage.
This was not fun.
BTW - the longer piece of molding goes to the back door. The termite repair is coming along and once finished I will get some pics.
 This is better, now you can see part of the stripped wood work her.
Didn't 'SWMBO' do a good job?
 The back door is getting ready to receive it's second coating of stripping chemical.
Stinky and yucky, but worth it.
 Do you recognize the chimney chase?
All that needs to be done on it is the mudding. I'm waiting till all the stripping and sanding of the woodwork is done before I mud this.
I figure that once the stripping is done I can mud this and plaster the wall while at it.
 Same view different angle.
You can also see the first stages of patching the plaster. It took almost a week to prep the plaster before it could be patched.
 Another view of the wall with most of the damage.
 The hole in the floor (where the pipes go into the basement) has been repaired with the exception of one little hole (grey spot next to the triangular patch). This will need to be patched from bellow.
The next step here will be to replace the wood flooring.
We lucked out here. Turns out that some of the same flooring used in the house was also used on the original porch. When the porch was torn down (sometime in the 30s) and replaced with cement, the owners at the time placed the wood in the attic to set stuff on.

Just another view of the sewer and water pipes.
Do you see how there is a square section of flooring missing around the pipes? No, it is not that way because I'm too lazy to cut flooring to fit. I've had left this space for two reasons.
#1 A high voltage power cable (the one that powers the upper floors) will go through it;
#2 If for some reason there is a water line break in the piping above, the water will follow the pipes and go through this hole into the basement. I'd much rather have the water there than in the back entry.
Before you scratch your head and think "Hmmm...power lines and potential water - in the same spot...." Got it covered. The power line is encased in an extra layer of rubber and will have a drip catch on it.
 Okay, do you see the spot of plaster between the two water pipes? That will be going 'bye-bye'. I will run the power cable through this spot.
It isn't all that noticeable in the pic, but you can see both ceilings if you look close enough. The original ceiling is the one the pipes are going through. The other ceiling is the one that looks finished and forms the square cut-out. There's about a 1-1/4 inch gap between the two.
While working on this, and the other water damage. I found out that about half the second ceiling had broken loose and was just barely hanging on. So, I ended up having to reattach that part of the ceiling.
 Here's another view of the floor. This part is in the prep area.
Don't you just hate to see it go?


No comments:
Post a Comment