The following pictures, and tasks, were done between the 13th and 17th of October.
That being said, let's jump right in.
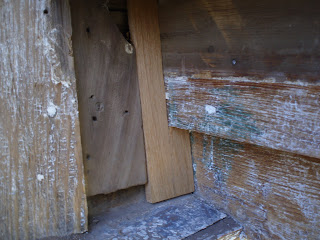
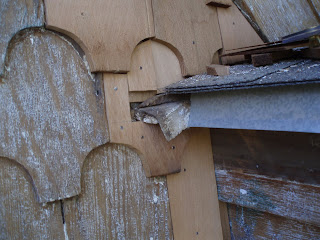
 Here are a couple of the wasp nests we've found.
 These two were not active but we've had a lot of wasps buzzing around; not sure where they are coming from though.
Also, while working on the fascia of the east gable we found a hole in the roof. It couldn't have been in a worst spot - right above a 25' drop. We had to cantilever the scaffolding out to work on it.
 See that slash of bright light behind the nails? That's where the hole is - the sun is shining through.
In order to work on it we had to remove a bit more of the original fascia than we wanted to. All that's left is the flashing and shingles.
 "Hello there!"
Yours truly's finger.
The hole is about 4 to 5 inches long and about 2 inches wide.
This was not a fun hole to repair. Sorry there are no pictures of the repair process but I was more concerned with safety than pictures at the time!
 This is the underside after repair.
We inserted new wood under the hole and a metal cap from the top. Under the new piece of wood we installed the pieces that the gutter will be attached to. Then we used a generous amount of caulk to finish it off.
 Not too bad of a repair is it?
We then found another issue to deal with - the top south east corner of the fascia was separating.
 From this view it doesn't look too bad, but moisture could still get in and so it needed to be tightened up.
Don't you just love this scaffolding?
I let the father-n-law stand on top of that tiny platform in order tighten the corner. I spotted him (just in case) and made sure the contraption didn't collapse under him.
Once this problem was tackled I decided to go ahead and make the replacement fishscale for the east gable while he cut away the remains of the nails that had held in the bad moulding.
On to the fishscale.
From what I've learned there were seven basic styles of fishscale manufactured when our house was built. All the builder had to do was chose what they wanted and order it.
In our case the builders chose half-cove and octagon for the gables.
To our knowledge we are the only house in town with this combination. All the other houses have either round, octagon, half-cove and triangle and only use one style with no mix or matching. However, there is one other house that uses square and triangle fishscale on the house. Instead of in the gables though this house uses it as siding!
 To make the repairs easier I cut out a half-cove and octagon template on my scroll saw.
This is the half-cove template.
 I then cut out about 20 of each on the band saw.
For the most part it was fairly easy to replace the bad, and missing, fishscale; but sometimes I'd run into a real puzzler.
 Here is the lower section of one of those 'puzzlers'.
First thing needing to be done was replace the under portion of shingle that covered the flashing. It also added a base to attach part of the upper portion to.
 This is part of the upper portion.
This is another part of the upper portion (you can see the piece from the previous picture directly below it).
While installing it I hit something rather hard and it bent the nail. I just hammered it down since it was secure and would be covered anyway.
Next up was building the actual puzzle piece.
 And here it is.
I would like to have installed it as a single piece but it just wasn't possible.

The upper arch area had to be removed and then reattached.

This is the same corner as the one in the last picture of the previous post - only repaired. The puzzle piece is in the middle.
All that needs to be done is the caulking of the divot in the puzzle piece.
You can see eight pieces of replacement fishscale in this corner. What you don't see are the many, little pieces of shingle it took to build it up for the finish fishscale.
 Another puzzle piece. This one was easier but note the size of it compared to those around it.
75% of the fishscale were the same in general size but the other 25%, such as this one, were irregular and appear to have been used as bridging pieces.
The one you see here is a duplicate based on the remains of the original. I will talk about this process in a later post.
It took most of the day to replace the fishscale that could be reached without adding a second level to the scaffolding. When finished the workday was over.
We decided that the following day I would devote to glazing windows and SWMBO (since she would have the day off) would get to work with her father.
The next two pictures are of me glazing away at about 20 some-odd feet.


Since turnabout's fair play I decided to take a few pics of SWMBO working.
 Here she is helping her dad install the pieces of fascia that the guttering will be attached to.
She was so pleased with herself at this point - she actually used the cordless drill to attach a piece of the fascia.
It might not sound like a big deal but trust me, it was! Do you have any idea how hard it is to screw something into 100+ year old wood?! Also, the screws we needed to use were not small ones; take a look to the left of her father's hand - that's part of a 3.5" screw.
I will be doing a special post on what it took to deal with this old wood soon.
 Here they both are working on the east gable; I was still glazing away.
At this point there is still only one level of scaffolding up there.
Before I leave you let me share a few more pics showing some of the small projects being worked on or finished during this time period.
 The white stripe is what you need to notice in this picture. It is the new crown moulding that is under the built-up area the gutter will be attached to. When the gutters are installed they will create a 'double crown' effect.
 This blob of gray is the the second layer in that rotten spot under the kitchen window. The gray stuff is bondo for wood. Once this is sanded down a bit another layer will be added.
Note that the exterior window casing above it is missing. It was in such bad shape I've decided to replace it.
 This last one is just a few scraps of old clapboard attached to a board. The intention is for SWMBO to use it in order to make a decision as to what colors will be used on the fishscale.
As to this project - lets not go there... The colors have been decided upon but it was a very painful process. At least this mock-up did what it was to do. Perhaps I will share pics of it being used in a later post.
While we're on the topic of fishscale colors...
To give you an idea how far we have come since my last post, and how much I need to fill you all in on, the east gable is basically painted and finished. All we lack in order to call that part 'complete' is about 3 more hours of paint touch-up.
Well, it's late and I'm tired so I'll go ahead and close this post.
Till next time...
Cheers!
Larry


4 comments:
hi, i started at the beginning and just arrived here. this scraping and painting is epic, man. i can't wait for the next installment. the lead i'm inhaling must be affecting my IQ -- i love this stuff, and haven't read another such epic since greg at petch house painted his fish scales. that just about killed me.
Wow, you guys are doing some serious work. Amazing. Keep it up!
Loving the tied dyed shirt, very cool!
The progress is looking awesome!
Very impressive progress! I have virtually identical wasps nests where my eaves meet too. And after seeing you scaffolding, I am going to stop whining about how tall my ladder is :)
Post a Comment