Friday, December 24, 2010

Merry Christmas

From our house to yours ~

Merry Christmas!!


Friday, November 26, 2010

Fireplace Find

Hello Everyone!!

I hope you all had a great Thanksgiving!

Around here the Christmas seasons kicks-off with something called 'Christmas in the Country'. It's a small holiday festival held in a small town not far from where we live. It takes place the Friday and Saturday after Thanksgiving.

Located in this town is an awesome antique store we love to rummage around in. There is a cast iron summer cover for a fireplace there I've ogled for quite some time. The owner of the shop saw us looking at it and told us the cast iron surround was outside behind the shop.

Like I said, we knew the summer cover was there for a few years but had no idea he had the cast iron surround that it belonged to!

I have always been a big fan of Victorian cast iron fireplace surrounds so I just had to look.

This is what we found! Sorry the pic is a bit 'fuzzy'; all I had was my cell phone to work with.

Anyway, the surround, and summer cover, came out of a house that was built in 1883 and burned to the ground in the '30s.

As you can see there is some damage, but it can be fixed. The mantle shelf has the worst damage but there are some foundries in our area that might be able to help us.

Also, there are four panels that can be removed. I need to do some research, but I think the inserts are removable so that they can be replaced by tile, marble, etc. I've also seen these panels painted in faux marble and tortoise shell.

Isn't this summer cover exceptional?!

As you all know, we are really looking at installing a fireplace in the living room. We are hoping we can use these; they are truly unique. To be honest I don't think I know of a single house in the area with a cast iron surround.

As soon as I get the surround home, and cleaned up, I'll get some better pictures and post them.

Before I forget, now that it is getting colder, and we can no longer do a lot of work on the outside of the house, I'll start bringing you all up to speed on the painting progress.

Till next time...

Cheers!
Larry

Thursday, November 11, 2010

Special Post #2 - Primer and Paint

Hello everyone!

Now that we're almost done with the house painting (for this season anyway) I thought I'd do a special post in regard to the primer and paint we choose to use.

While growing up I learned that there are certain things one must never skimp money on; some of those being jewelry for the wife, life insurance, and exterior primer and paint for your house.

What motivated us to seek out the best paint and primer, for us anyway, was peeling paint on fishscale attached to a house recently painted.

A few years ago, about the time we bought this house, a friend of ours, and her husband, bought an old 'fixer-upper' in the country. Part of the rehabilitation was the scraping and painting of the fishscale on the house. Unfortunately the paint on the fishscale started to pop and peel not too long after painting. We did not want this to happen to us.

So the research started in earnest.

We have literally spoken to some of the top people in the field of historic house siding restoration, replacement, prep and painting as well as up-keep. We spoke with restoration specialists ranging from those who are working on Madison's Montpelier all the way to one who deals with restoration at the White House. Most of those we spoke with though were house painting and historic house restoration specialists as well as old house nuts like us.

Two of the best on-line articles we referred to often were the following:

A Pro Confides His Best Tips for Painting Exteriors

and

Peeling Paint Looks Shabby

The first one was our play-book. We did almost 100% of what was in the article in order to prep the house.

The second is by and far THE best article I've ever read on why paint peels. In totality it explains why you must remove all the old paint you can; so if your looking at painting - read this article!!!

About the only thing we did not do, that both articles mention, was some form of oil conditioning before priming. The reasons we chose not to do this oil conditioning can be boiled down to two reason - condition of the wood and the desire NOT to use oil based paint.

After speaking to a few pros, especially Mr. Leeke (who wrote the second article), it was determined the wood siding and trim on our house just did not need this treatment. Our house is sided in Ceder and holds up fantastically to moisture, rot and insects.

Also, the oil conditioning treatments can take up to two weeks, if not a month, before drying enough to allow painting. Also, the only treatments we could find (other than making our own) required priming with oil based primer.

Contrary to popular belief, you do not need to use oil based products on a house to get a great finish. Do some research; as long as your primers and paints are based on 100% acrylic resins your finished paint job will be just as good as, if not better than, the oil based product jobs.

Oh, by-the-way, one thing some paint dealers are not telling people is that oil based paint products are being phased out of production and are even illegal in some parts of the country. Because of this you will have lots of dealers, and painters, push the product.

After a TON of research, and all those conversations, we decided on a primer many people have never heard of - XIM Peel Bond. You can read more about it here.

As their logo states "When Ordinary primers Are Not Enough".

This stuff is great but a takes some getting use to. It goes on a milky white color but dries clear. When it's clear it's ready for the top coat.

Check out the video!


This is what the Peel Bond looks like going on.


And here it is dry. The 2/3rds of the clapboard that looks 'shadowed' is actually the dried Peel Bond.


Interesting thing is is that it feels kind of like plastic!!

We have had a lot of people watch us paint and think that the house paint is the primer - they can't see the Peel Bond!!

The part I think I like best about the Peel Bond is that it has an elastomeric property that allows it to move, bend, and swell with the house without cracking.

Since the outside of the house is primarily made of Ceder we did need to add a 'bleed control' to help keep the tannins in control. "WHAT? A 110+ year old house still has tannin bleed?!" Yes, the 110+ year old ceder still 'bleeds' when wet. It's not as bad as the new clapboard, but it did bleed in spots.

Luckily XIM also produces a product to help - Bleed Control 100TM.

There is one slight pitfall to using this additive - the primer/paint must be used within 24 hours or you run the risk of it going bad. Evidently it develops a rubbery cottage cheese type consistency if not applied. There is a contractor out there that learned this lesson the hard way. He bought 15 5-gallon buckets of Peel Bond and added the Bleed Control in order to save time down the road. A few days later, when he opened the buckets, the Peel Bond looked like cottage cheese made of rubber. Oh well, he should have read the instructions, it is clearly mentioned!

Now, as you all now, we have some crown moulding on the house we can not match and want to retain. It has weathered badly and has a lot of pitting and corrosion in spots. Once again XIM came through with the product to help us out - Trim Magic.

This stuff is just like the Peel Bond but is thicker and is an ultra high build filling primer.

In layman's terms, the Peel Bond was as thick as pudding and the Trim Magic as thick as custard.

Unfortunately not many people in my area have heard of the XIM products. However, when anyone, contractor or home owner, came to take a look I told them all about it.

Any of you out there looking at painting I highly suggest you check out the XIM products.

Now for the paint.

After just as much research we decided on going with Valspar Duramax with Crosslinking Ti3 Technology.

The coverage is exceptional and applies very well. Because of this we have not had to use near the amount of paint we first thought we would need to.


For general information on Valspar Duramax go here.

For the product datasheet go here.

In making our decision the three main aspects of Duramax that we were sold on are - triple resistance against mold, mildew and algae growth; maximum UV protection; and a lifetime warranty.

However, THE #1 seller for us is that the Duramax paint is an elastomeric paint. In other words, it will bend, stretch, and contract with the house without cracking, splitting or peeling. This elastomeric aspect goes hand-n-hand with that of the XIM peel Bond.

Unfortunately most people do not take into account that a house WILL move with the seasons. If you do not use primers and paints that will move with it the paint job will fail.

Lets get back to the 'exceptional coverage'. Part of this can be attributed to all the prep work as well. I can't stress enough the attention that needs to be paid to the prep work. All too often people just concentrate on priming and painting without much thought to prep. Without proper prep a paint job is doomed to failure.

I will admit though, even with all the research, all the prep work, the use of XIM products and Valspar Duramax, we are still worried that our paint job could fail.

Till next time...

Cheers!
Larry

Wednesday, November 10, 2010

House Paint Teaser II

Yes, I know it's mean, but here's another teaser.


Till next time...

Cheers!
Larry

Tuesday, November 2, 2010

House Paint Teaser

Thought I'd toss out a teaser.

Here's your first look at the actual paints decided on for the house.


Have fun figuring out where each of those colors will be used!!

BTW - two of the colors don't look the way they should. The white colored one (center paddle) is actually a cream color; the gray looking one (3rd paddle from the right) is actually a light tanish green - they both look better on the house!

Till next time...

Cheers!
Larry

Special Post #1 - DeWalt

Hello Everyone!!

Sorry for the long delay again but we have been VERY busy!! We are sooooooo close to having the main part of the house painted! We will finish it - primarily the north side - next Spring. Soon I will be posting pictures of the paint.

In the meantime, here's a special post.

Remember way back on December 17, 2009 when I posted about the DeWalt tools I was asked to test?

If not you can read it here - A Gift from DeWALT.

Well, it's about time I give you an update on how this puppy works.

One word - AWESOME!!!

Yup, you heard me - AWESOME!!!

I have been using the DeWalt IMPACT READY™ tools a lot; especially with all the little repairs that have needed to be made during paint prep.

These tools, and accessories, are definitely well worth getting. Perhaps the main test we put them through that impressed us was the repair of the fascia on the west side of the house.

To refresh your memory go here - Soffit Just About Done.

Keep in mind, the wood we were having to drill into is well over 100 years old, and we think it is cottonwood. Over time cottonwood, like some other woods out there, gets incredibly hard over time. We were having to drill pilot holes constantly and even broke three drill bits while doing it. Even though we broke drill bits I'm happy to say they were not the DeWalt bits that came with the set o I wasn't too bothered by it.

Also, we switched from the typical battery that came with the set and started using the DeWALT DC9096 XRP 18-Volt 2.4 Amp Hour NiCad Pod Style Battery.

WOW!!!

This battery really upped the ante!

With one charge we were able to work the entire three days it took to repair the eaves. This included drilling pilot hose as well as screwing 3.5" and 4" screws.

Once this project was finished we decide to see just how long we could use the bigger battery before it died.

Result - 8 days.

Yup, we got 8 days of use out of the battery once it was recharged. This wasn't 8 days of constant use but it was used several times a day during those days. If I were to boil it down to days of constant use I'd say it lasted at least 4 if not 5 days.

Here's the drill after the battery finally gave up.

The drill itself is a little worn now, but it keeps going strong.

In a nut shell - I'm definitely a DeWalt guy from now on. Anytime one of the power tools need to be replaced it will be with a DeWalt.

Till next time...

Cheers!
Larry

Sunday, October 24, 2010

Lots and Lots Done

WOW - it's been so busy around here I haven't even wanted to think about posting! All I've wanted to do is sleep - especially with the 10+ hour days we're putting in.

The following pictures, and tasks, were done between the 13th and 17th of October.

That being said, let's jump right in.

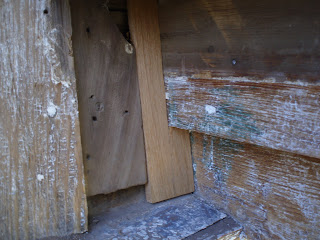
Here are a couple of the wasp nests we've found.

These two were not active but we've had a lot of wasps buzzing around; not sure where they are coming from though.

Also, while working on the fascia of the east gable we found a hole in the roof. It couldn't have been in a worst spot - right above a 25' drop. We had to cantilever the scaffolding out to work on it.

See that slash of bright light behind the nails? That's where the hole is - the sun is shining through.

In order to work on it we had to remove a bit more of the original fascia than we wanted to. All that's left is the flashing and shingles.

"Hello there!"

Yours truly's finger.

The hole is about 4 to 5 inches long and about 2 inches wide.

This was not a fun hole to repair. Sorry there are no pictures of the repair process but I was more concerned with safety than pictures at the time!

This is the underside after repair.

We inserted new wood under the hole and a metal cap from the top. Under the new piece of wood we installed the pieces that the gutter will be attached to. Then we used a generous amount of caulk to finish it off.

Not too bad of a repair is it?


We then found another issue to deal with - the top south east corner of the fascia was separating.

From this view it doesn't look too bad, but moisture could still get in and so it needed to be tightened up.


Don't you just love this scaffolding?

I let the father-n-law stand on top of that tiny platform in order tighten the corner. I spotted him (just in case) and made sure the contraption didn't collapse under him.


Once this problem was tackled I decided to go ahead and make the replacement fishscale for the east gable while he cut away the remains of the nails that had held in the bad moulding.

On to the fishscale.

From what I've learned there were seven basic styles of fishscale manufactured when our house was built. All the builder had to do was chose what they wanted and order it.

In our case the builders chose half-cove and octagon for the gables.

To our knowledge we are the only house in town with this combination. All the other houses have either round, octagon, half-cove and triangle and only use one style with no mix or matching. However, there is one other house that uses square and triangle fishscale on the house. Instead of in the gables though this house uses it as siding!

To make the repairs easier I cut out a half-cove and octagon template on my scroll saw.

This is the half-cove template.

I then cut out about 20 of each on the band saw.

For the most part it was fairly easy to replace the bad, and missing, fishscale; but sometimes I'd run into a real puzzler.

Here is the lower section of one of those 'puzzlers'.


First thing needing to be done was replace the under portion of shingle that covered the flashing. It also added a base to attach part of the upper portion to.

This is part of the upper portion.


This is another part of the upper portion (you can see the piece from the previous picture directly below it).

While installing it I hit something rather hard and it bent the nail. I just hammered it down since it was secure and would be covered anyway.

Next up was building the actual puzzle piece.

And here it is.

I would like to have installed it as a single piece but it just wasn't possible.
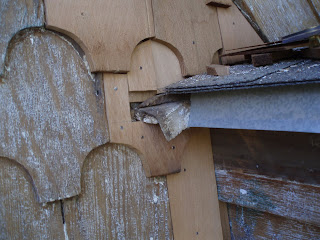


The upper arch area had to be removed and then reattached.


This is the same corner as the one in the last picture of the previous post - only repaired. The puzzle piece is in the middle.

All that needs to be done is the caulking of the divot in the puzzle piece.

You can see eight pieces of replacement fishscale in this corner. What you don't see are the many, little pieces of shingle it took to build it up for the finish fishscale.

Another puzzle piece. This one was easier but note the size of it compared to those around it.

75% of the fishscale were the same in general size but the other 25%, such as this one, were irregular and appear to have been used as bridging pieces.

The one you see here is a duplicate based on the remains of the original. I will talk about this process in a later post.

It took most of the day to replace the fishscale that could be reached without adding a second level to the scaffolding. When finished the workday was over.

We decided that the following day I would devote to glazing windows and SWMBO (since she would have the day off) would get to work with her father.

The next two pictures are of me glazing away at about 20 some-odd feet.


Since turnabout's fair play I decided to take a few pics of SWMBO working.

Here she is helping her dad install the pieces of fascia that the guttering will be attached to.


She was so pleased with herself at this point - she actually used the cordless drill to attach a piece of the fascia.

It might not sound like a big deal but trust me, it was! Do you have any idea how hard it is to screw something into 100+ year old wood?! Also, the screws we needed to use were not small ones; take a look to the left of her father's hand - that's part of a 3.5" screw.

I will be doing a special post on what it took to deal with this old wood soon.

Here they both are working on the east gable; I was still glazing away.

At this point there is still only one level of scaffolding up there.

Before I leave you let me share a few more pics showing some of the small projects being worked on or finished during this time period.

The white stripe is what you need to notice in this picture. It is the new crown moulding that is under the built-up area the gutter will be attached to. When the gutters are installed they will create a 'double crown' effect.

This blob of gray is the the second layer in that rotten spot under the kitchen window. The gray stuff is bondo for wood. Once this is sanded down a bit another layer will be added.

Note that the exterior window casing above it is missing. It was in such bad shape I've decided to replace it.

This last one is just a few scraps of old clapboard attached to a board. The intention is for SWMBO to use it in order to make a decision as to what colors will be used on the fishscale.

As to this project - lets not go there... The colors have been decided upon but it was a very painful process. At least this mock-up did what it was to do. Perhaps I will share pics of it being used in a later post.

While we're on the topic of fishscale colors...

To give you an idea how far we have come since my last post, and how much I need to fill you all in on, the east gable is basically painted and finished. All we lack in order to call that part 'complete' is about 3 more hours of paint touch-up.

Well, it's late and I'm tired so I'll go ahead and close this post.

Till next time...

Cheers!
Larry